Back to TheWorxHub for Senior Living Main Menu
Adding a User to WorxIQ
If you are an Admin in WorxIQ, you can add additional users to WorxIQ and define their level of access by assigning them to groups.
How to Add a User to WorxIQ
-
Click on Settings from the navigation menu.
-
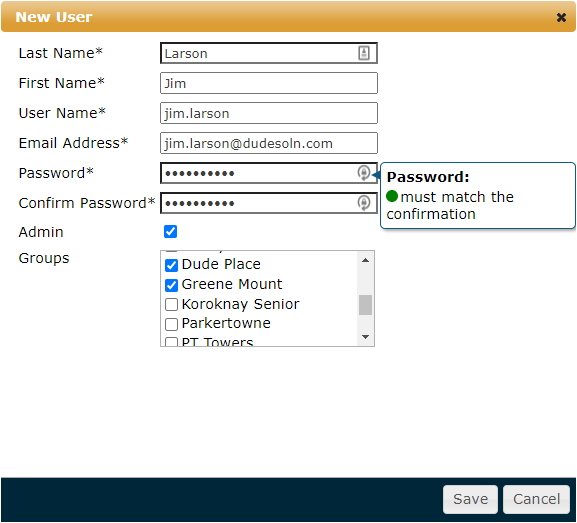
Under User Management, click the + New User button. A new window will appear.
-
Enter a Last Name.
-
Enter a First Name.
-
Enter a User Name.
-
Enter an Email Address for the user.
-
Enter a Password, and then enter it again next to Confirm Password.
-
Check the box next to Admin if you would like this user to be an Admin in WorxIQ. This will determine whether the user can access the Settings menu.
-
Check the box next to each of the Groups that this user should belong to in WorxIQ. This will directly affect the data that the user has access to under Analytics and Reports.
-
Click Save at the bottom of the window. A confirmation message will display, informing you that the user has been added successfully.
How to Edit a User in WorxIQ
-
Click on Settings from the navigation menu.
-
Click on the pencil icon (
 ) next to the user whose information you would like to edit.
 -
Make any necessary changes to the user's information. *Note: You cannot edit the User Name or Email Address fields. You must enter the user's password next to Confirm Password in order to save your changes.
-
Click Save at the bottom of the window. A confirmation message will display, informing you that the information has saved successfully.

How to Delete a User in WorxIQ
-
Click on Settings from the navigation menu.
-
Click on the trashcan icon (
 ) next to the user who you would like to delete.
 -
In the window that appears, click OK to delete the user.

